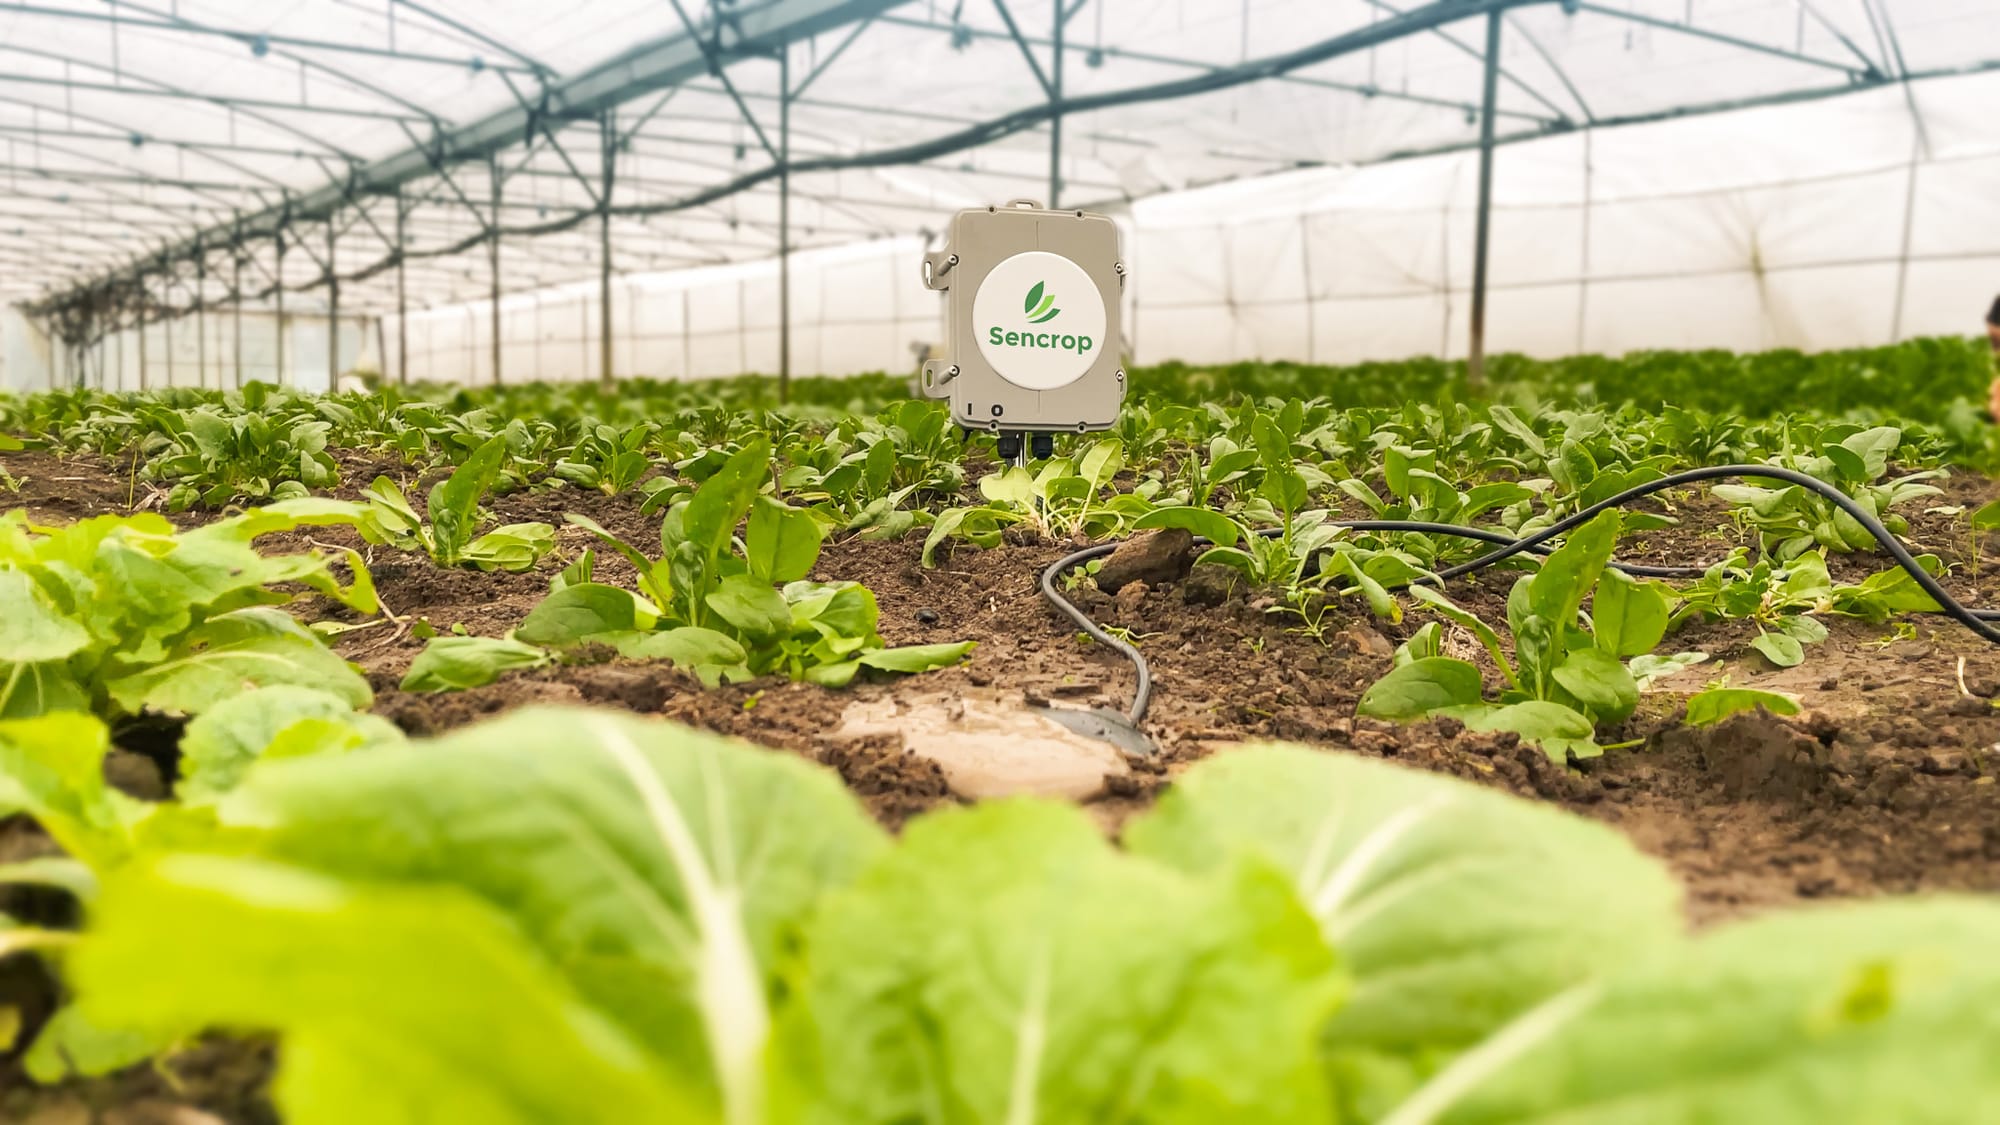
The correct installation of your soil probe is essential to guarantee the reliability and accuracy of the data measured.
Here are a few tips to ensure that your installation is optimal and that you can manage your irrigation as effectively as possible!
Understanding how capacitive probes work
Capacitive probes measure humidity and temperature directly in the soil. They are fitted with sensors (called electrodes) placed at various depths on the probe (generally every 10 cm), enabling the dielectric permittivity of the medium to be determined by measuring its electrical capacity. For each horizon, an algorithm converts the electronic measurement into a percentage of moisture, depending on the composition of the soil. Calibrating the probe is therefore crucial. We'll look at this point in more detail later in the article.
Where should the capacitive probe be installed?
Soil representativeness
For the data from your probe to be able to guide you in irrigating your plot, it is essential that it is installed in an area where the soil (and tillage practices) are representative of the whole.
If you are using one sensor to control several plots, then the soil must be representative of these different areas, or several sensors must be installed.
Vegetation representativeness
As with the soil, the vegetation needs to be representative of the plot, in terms of variety, density or technical itinerary, for example. A probe placed too close to the edge, for example, might not be sufficiently representative of the reality of the plot.
Representativeness of irrigation
Place the sensor in an area within the average doses delivered by your irrigation system.
Adaptation to the irrigation system
Depending on the irrigation system used, the probe will not necessarily have to be placed in the same place. For drip irrigation, the probe should be placed in the dripper's zone of action. When irrigating with a hose reel, position it in the first third of the passage to avoid overlapping areas. You should also be careful not to place your sensor in the wheel arch for boom or pivot systems.
How many sensors should I install?
The data read by a probe is very specific to the installation area. As mentioned above, it's crucial that the area is representative in terms of soil, vegetation and irrigation. You will need to multiply the number of probes if :
Your plot has very heterogeneous soil
You work the soil differently from one plot to another
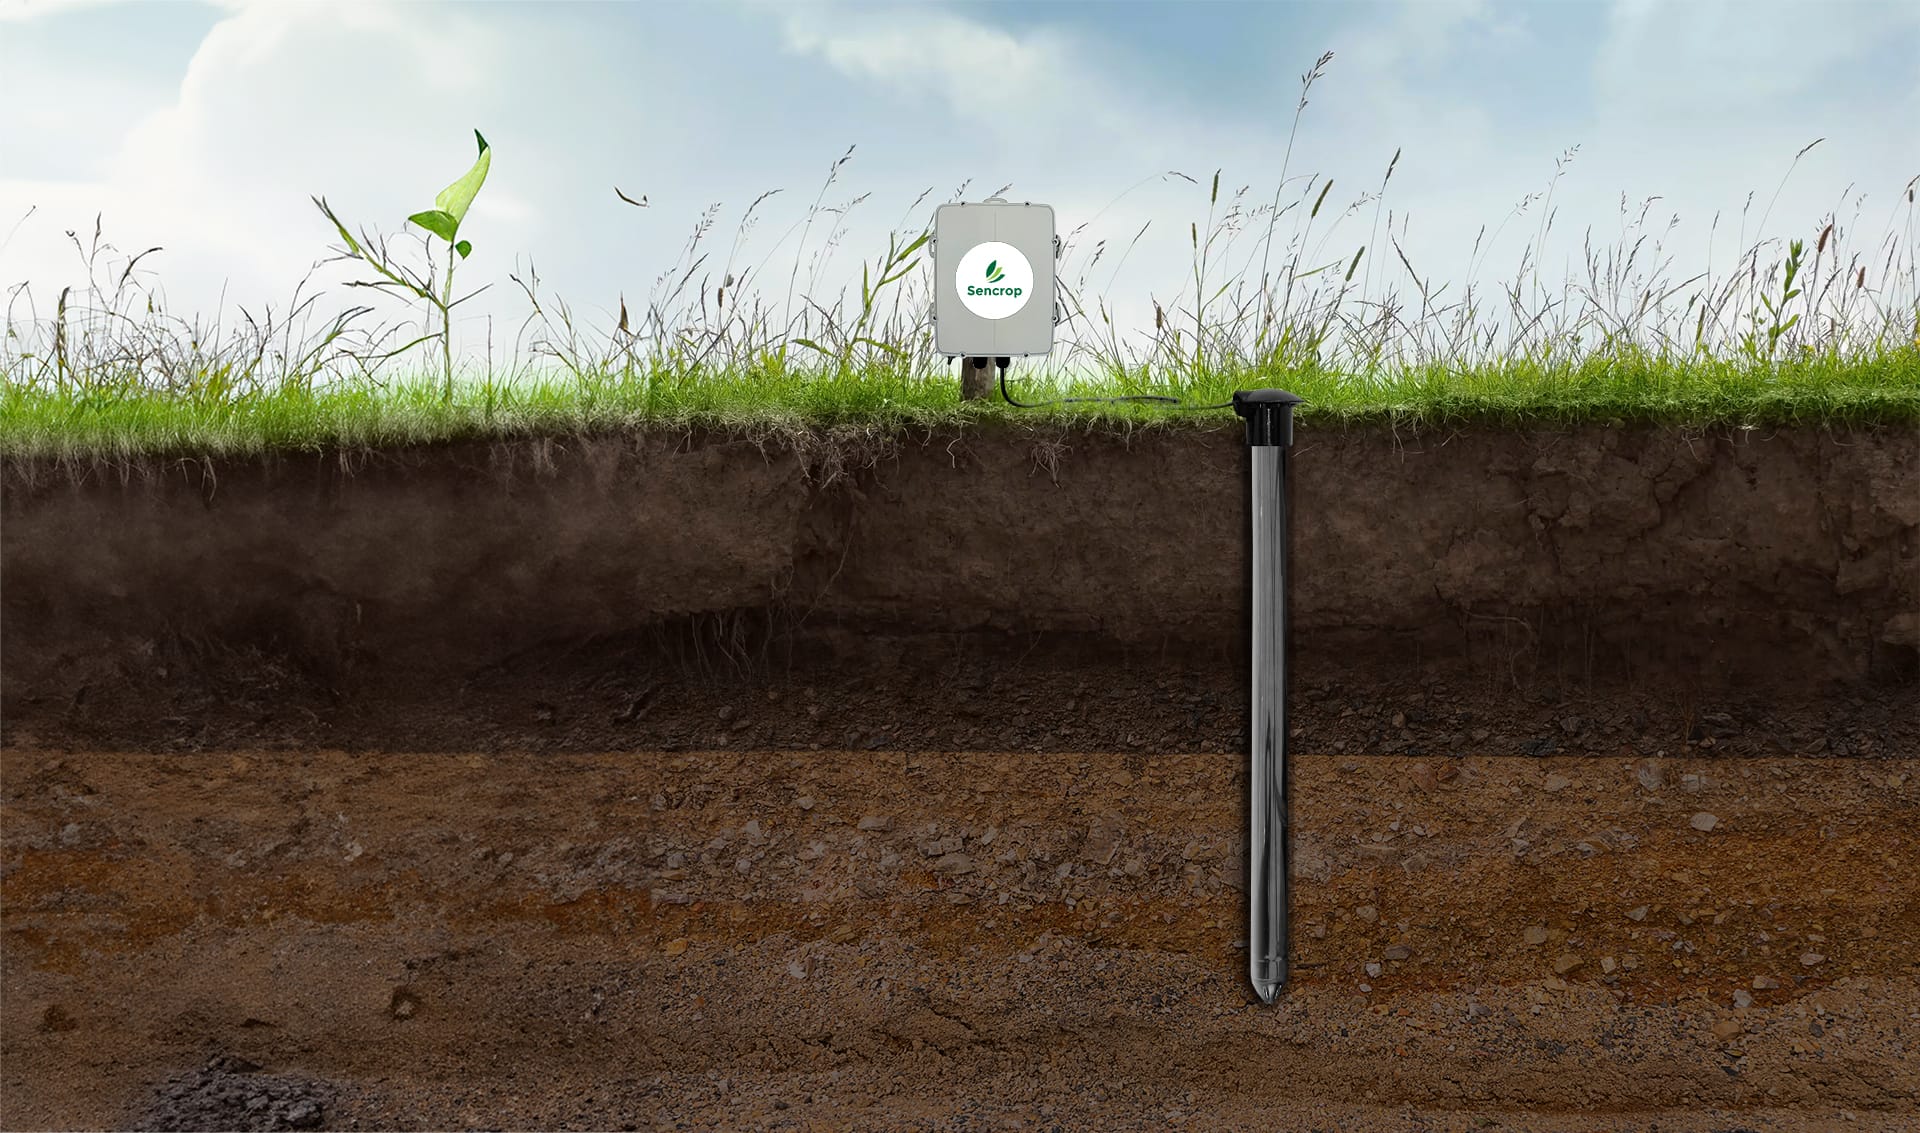
To install your soil probe correctly, take the following equipment with you: a manual or electric auger (for the Sencorp probe, the Soilcrop, take a 40 cm diameter auger), a bucket and water. Then follow the steps below:
Dig a hole as deep as you need to, depending on the size of your probe (for the Soilcrop, make a hole 65 cm deep).
Place the soil you have removed in the ground and mix it with 0.5 to 1 litre of water. This will create a smooth, even slurry.
Carefully pour a portion of the mixture into the hole, avoiding the creation of air pockets.
Gently insert the probe, without exerting excessive force, then pour in the rest of the slurry.
Connect the probe cable to the control box.
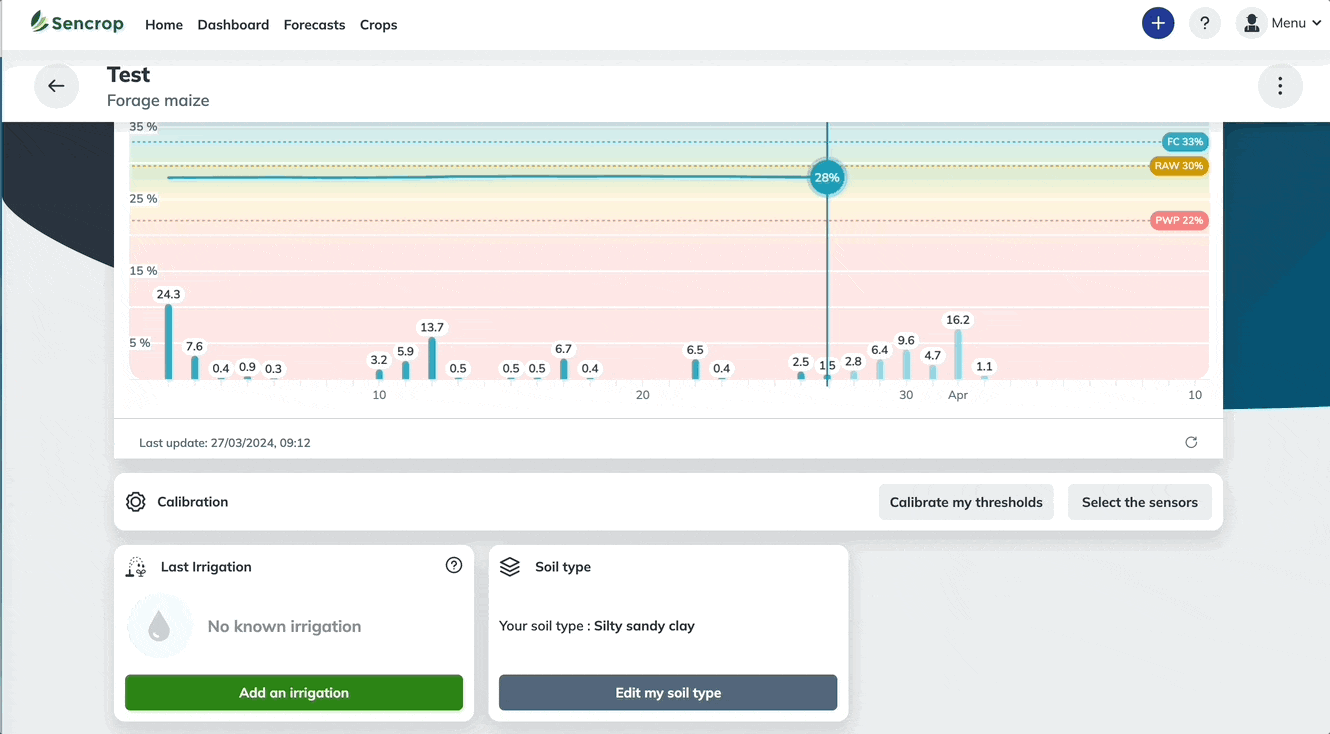
Calibrating the probe and its balance
Once the probe has been correctly installed in the soil, it is essential to ensure that it is properly calibrated, so that your water balance and your water stress alerts are representative of the reality of your plot and your needs.
First, enter your soil type. On the Sencrop application, you have two options:
If you don't know the exact composition of your soil, you can select from a list the soil type that is closest to yours (sandy-clay, pure silt, silt-sand, etc.).
If you have a soil analysis for your plot, you can enter the precise percentage of sand, silt, clay and organic matter.
Next, select the soil horizons that interest you. For example, for a crop with shallow roots, you can select only the first few horizons for calculating the median moisture content of your soil.
Finally, calibrate your moisture thresholds: Humidity by Volume at Field Capacity (HCC), Low Usable Reserve (low RFU) and Humidity at Wilting Point (HPF). Predefined thresholds are available depending on your soil type. If you wish to modify them to suit your needs, we suggest you consult a technician or an expert.
Twice a month, news on agricultural weather, ag-tech, and Sencrop innovations to enlighten you and help you make better decisions every day. Subscribe now! 👇